Cryptocurrency wallets play a vital role in managing and securing your digital assets. As the crypto market grows, you may find yourself wanting to switch wallets for various reasons, such as better security features, improved user experience, or compatibility with new cryptocurrencies.
In this comprehensive guide, we will explore the process of switching crypto wallets, discuss the possibility of switching between different types of wallets, and provide you with essential tips to ensure a smooth transition.
| 🔁 Topic | Details |
|---|---|
| 🔑 Switching Cryptocurrency Wallets: Non-Custodial | For non-custodial wallets, you have the flexibility to create, import, or connect to multiple wallets. An example is the Crypto.com DeFi Wallet app, where switching wallets is as simple as tapping your avatar and choosing the desired wallet. |
| 🔄 Switching Between Non-Custodial Wallets | To switch from one non-custodial wallet to another, you generally need to create or import a new wallet and then transfer your funds to it. The exact steps can vary based on the wallets you’re using. |
| 🏦 Switching Cryptocurrency Wallets: Custodial | If you’re using a custodial wallet, the process of switching may differ. You’ll likely need to adhere to the specific guidelines provided by the wallet service. |
| 🔐 Backing Up Recovery Information | Regardless of the type of wallet switch, it’s crucial to back up your recovery phrase or private keys. This step is essential to prevent any potential loss of funds. |
What you'll learn 👉
What does switching wallets mean?
Investors and traders in cryptocurrencies should use numerous crypto wallets to prevent having many coins in one wallet or exchange. Using the blockchain ledger, all transactions are tracked and recorded. Therefore, it is possible to switch through wallets and move coins.
You can move coins from one wallet to another, switch networks on one wallet and convert your coins into “real” money. In this article, we will go through all of these options and explain to you how to do it step by step.
How to move coins from one wallet to another – Example from Trust Wallet to MetaMask (steps described)
As mentioned above, you can move coins from one crypto wallet to another. For the purpose of this article, we will use Metamask and Trust Wallet as examples since these two are one of the most popular crypto wallets globally.
You can get your tokens if you enter your Trust Wallet seed phrase into your MetaMask because your wallet is on the blockchain and is protected by your seed phrase. So, you will discover how to transfer cryptocurrency from MetaMaskto Trust Wallet in this guide.
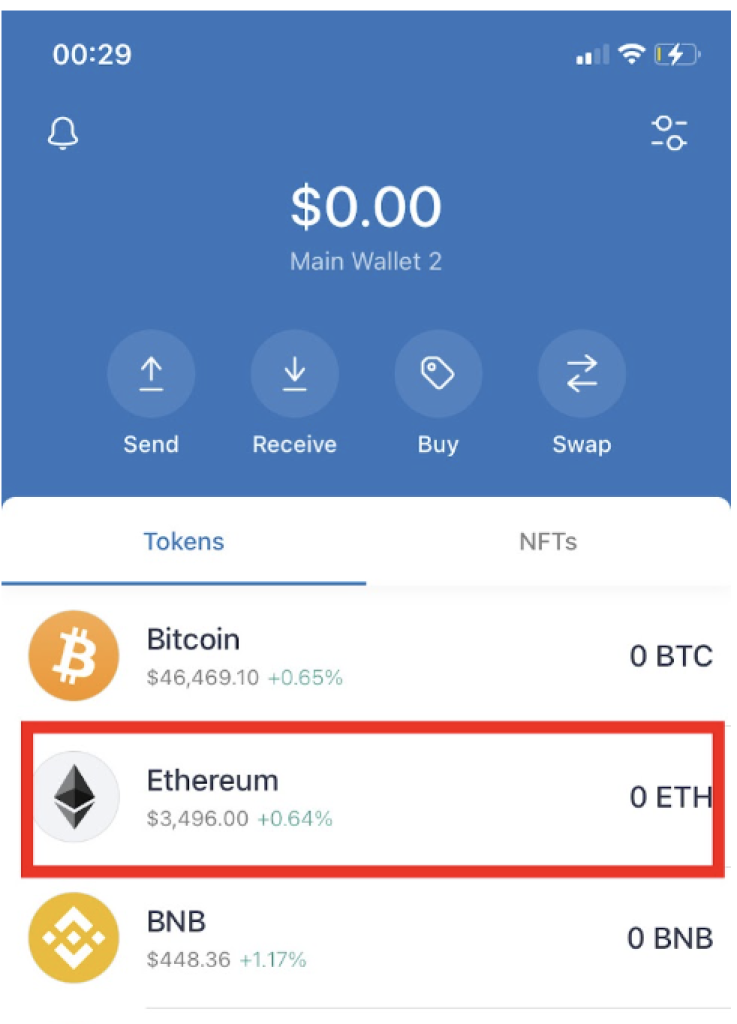
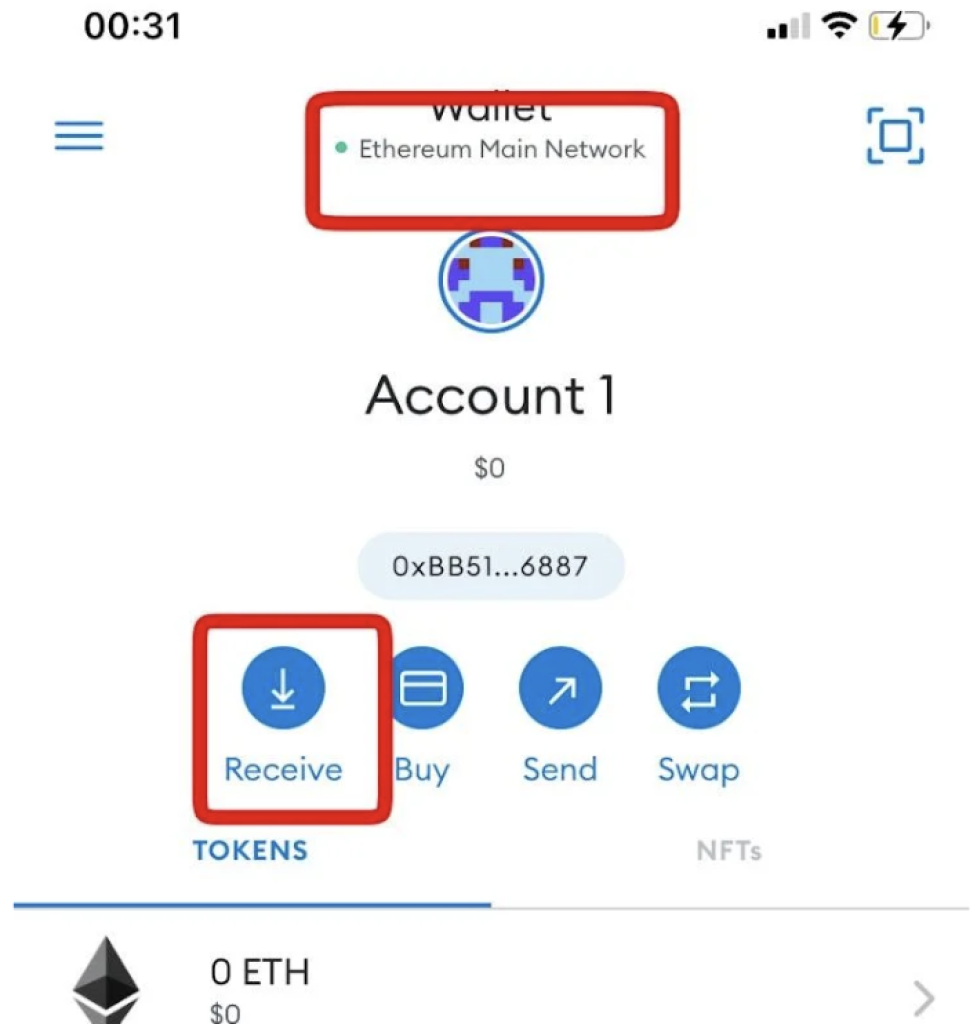
The first step is to open your Trust Wallet and select the cryptocurrency that you wish to send. We will use Ethereum as an example in this guide.
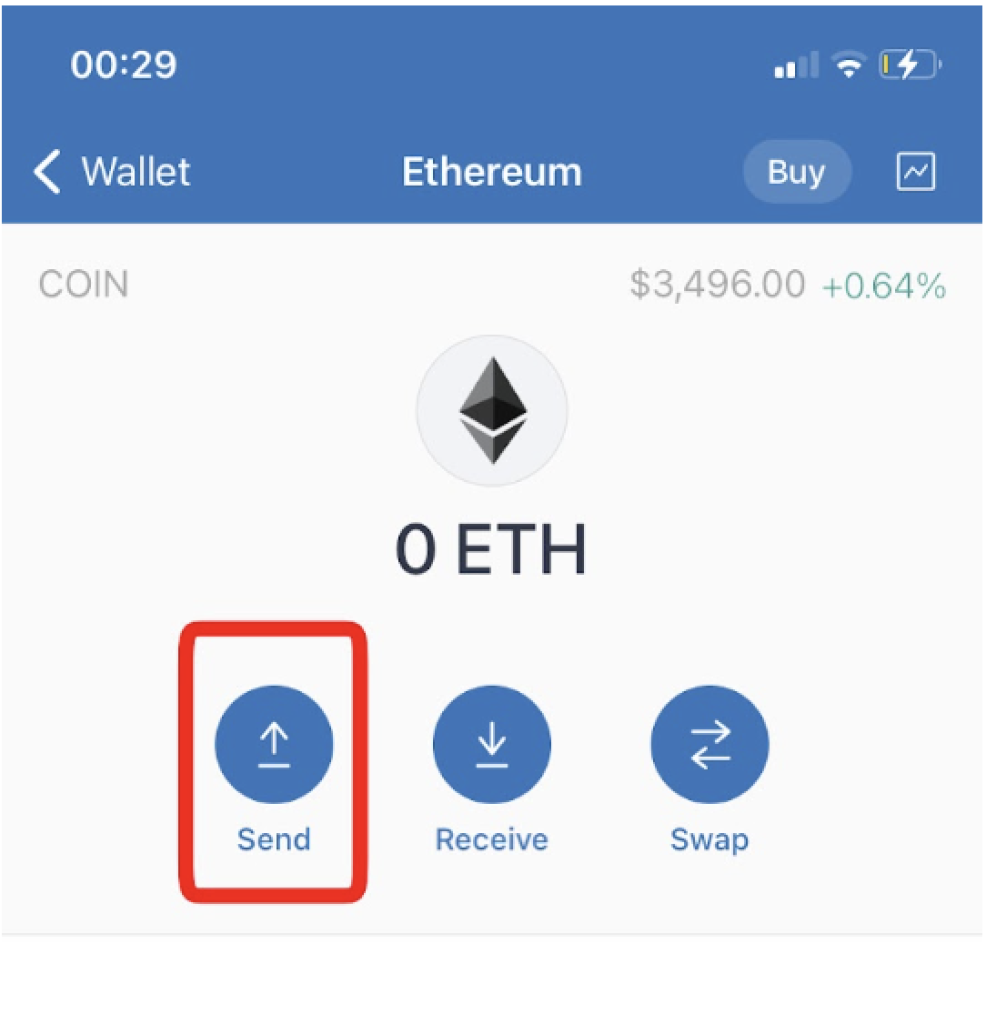
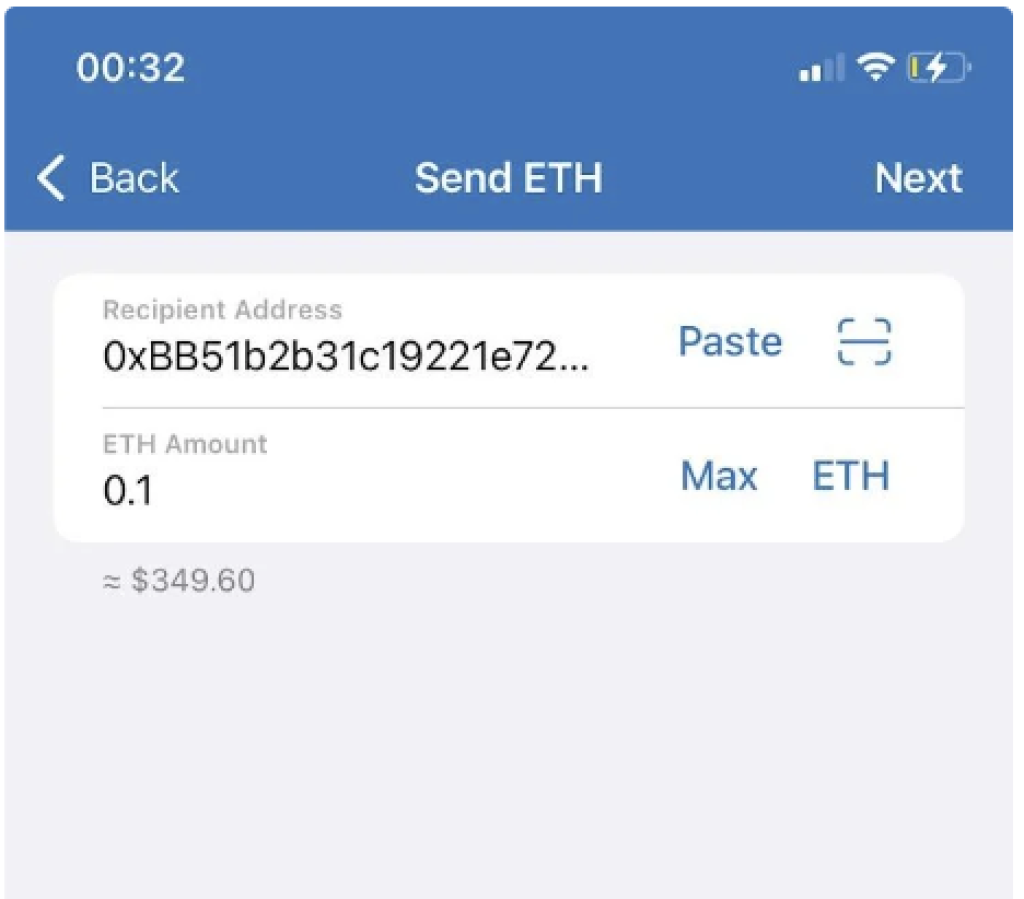
Now the next step is that the recipient address needs to be pasted; we open the MetaMask and verify that the MetaMask wallet of the recipient is connected to the Ethereum network since we are moving the ERC-20 token. After that, we select the Receive button, copy the ERC20 address, and then paste it into the recipient address on the Trust Wallet.
Note: By selecting the scan icon on the Trust Wallet, we can also read the QR code for MetaMask.
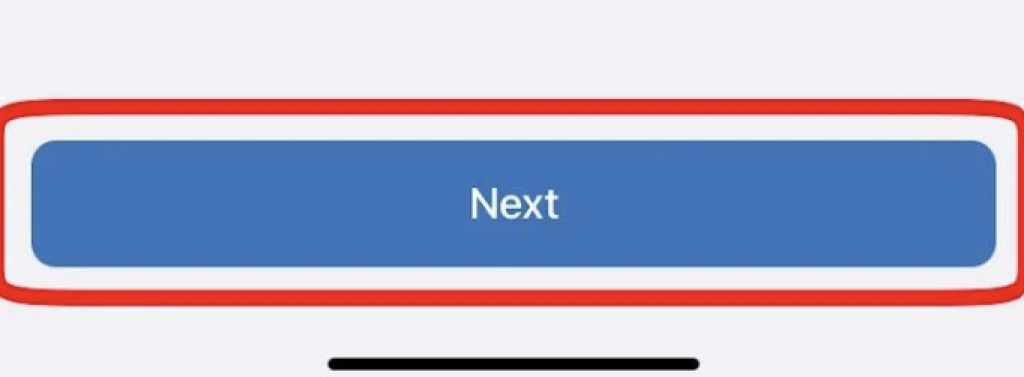
Now we can actually send the coin once we select the amount we wish to send and then click on the “Next” button, as shown on the screenshot below.
The final step is to “confirm” the transaction. And that’s it; you have now successfully moved coins from your Trust Wallet to your Metamask wallet. The whole process should not last more than a few minutes, and once the transaction is confirmed, coins should be visible on your MetaMask wallet in a few minutes as well.
How to switch networks on one wallet – For example, switch from Ethereum Mainnet to BNB Smart Chain on Metamask (steps described)
You can use different networks in addition to the Ethereum mainnet, where the Metamask wallet initially only works. Please be aware that you must manually add them. This guide will demonstrate how to install the Binance Smart Chain network to your MetaMask wallet in just a few easy steps. No matter what software or operating system you use, the procedure is the same whether you’re using Chrome, Firefox, iOS, or Android (Metamask can be used on all of these systems).
For the purpose of this article, we will use Chrome.
The “Add network” button can be found in the drop-down menu next to the Ethereum mainnet button in the top right corner of your browser, as shown in the screenshot below:
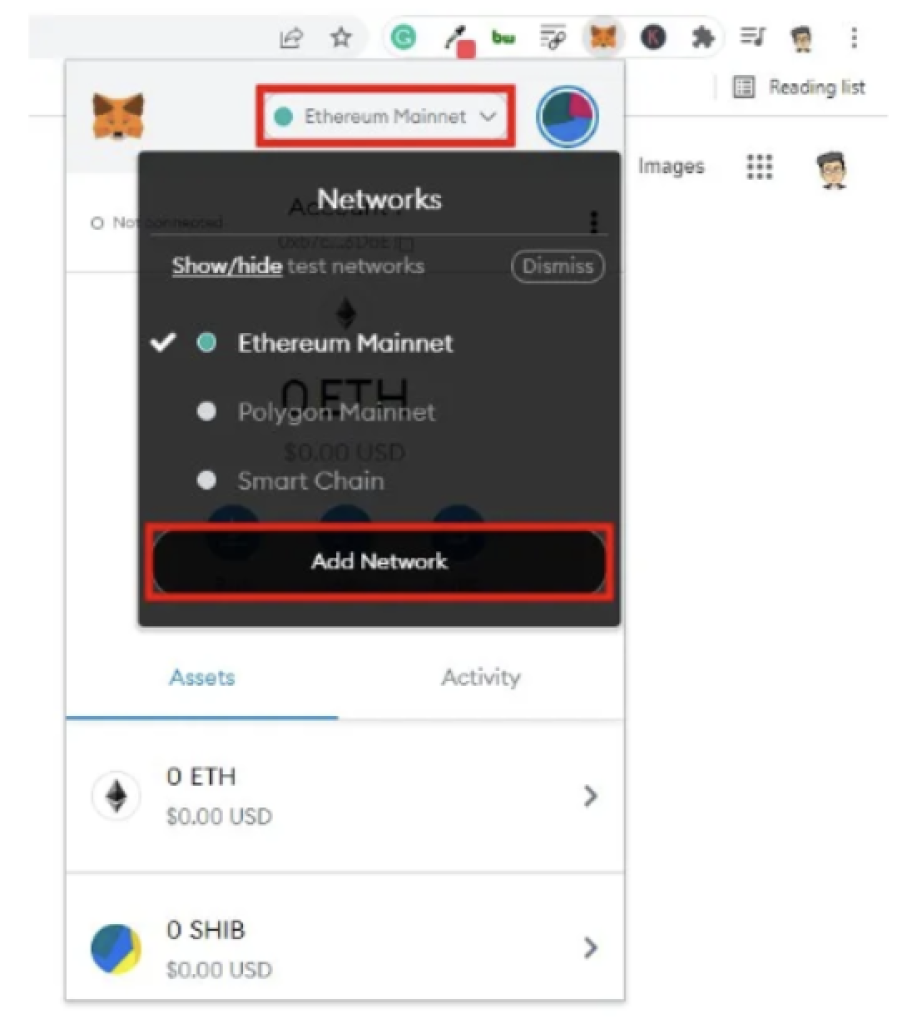
One thing to note is that there is another way to get to add a new network screen; the profile circle on the top right corner->settings->networks->add a new network.
The next step is to fill out the necessary information for the Binance Smart Chain mainnet to add the network to your wallet. You have to enter the following data: Network Name, New RPC URL, Chain ID, Currency Symbol, and Block Explorer URL(Optional). Please find below the necessary details:
- Network Name: Smart Chain
- New RPC URL: https://bsc-dataseed.binance.org/
- ChainID: 56
- Symbol: BNB
- Block Explorer URL: https://bscscan.com
Once you enter all the information above, your screen should look like the screenshot below:
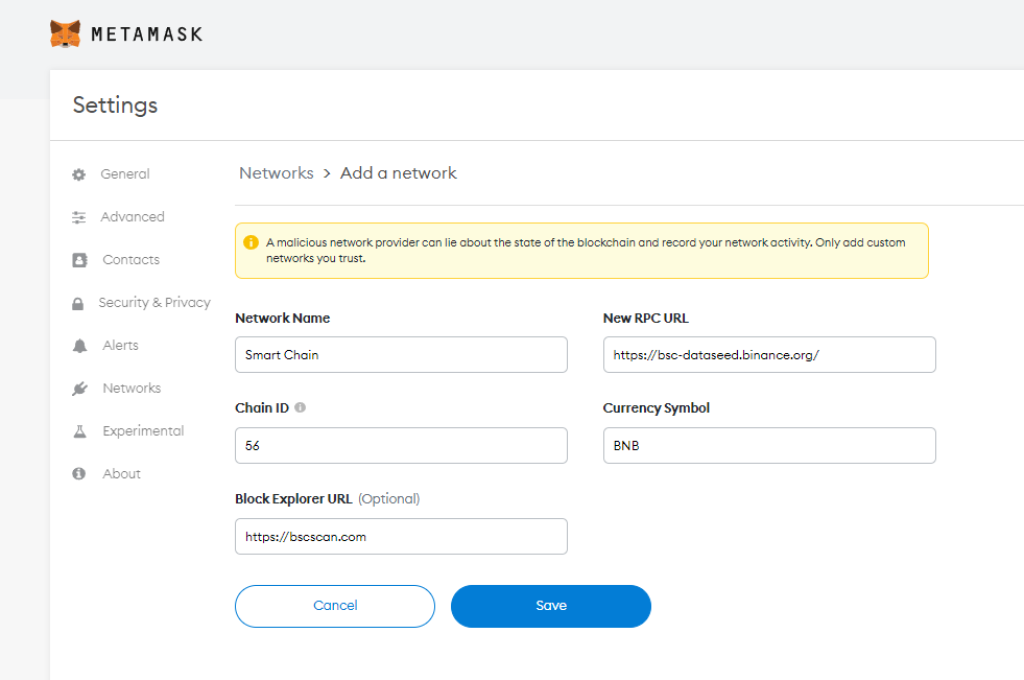
If everything is fine, click on the “save” button. And that’s pretty much it; you have now successfully added Binance Smart Chain mainnet to your Metamask wallet. Keep in mind that you have to be an owner of a BNB coin in order to operate on this network since that coin will be used to pay for the gas fees (similar to ETH is used on the Ethereum network to pay for the gas fees).
How to convert coins into cash – For example, send coins from MetaMask to Coinbase and sell them for cash (steps described)
If you do not keep coins on the exchange but rather on a crypto wallet, you will have to move the coins to the exchange and then sell them for cash. For the purpose of this article, we will use MetaMask and Coinbase as examples since these two are among the most popular crypto wallets and exchanges in the world.
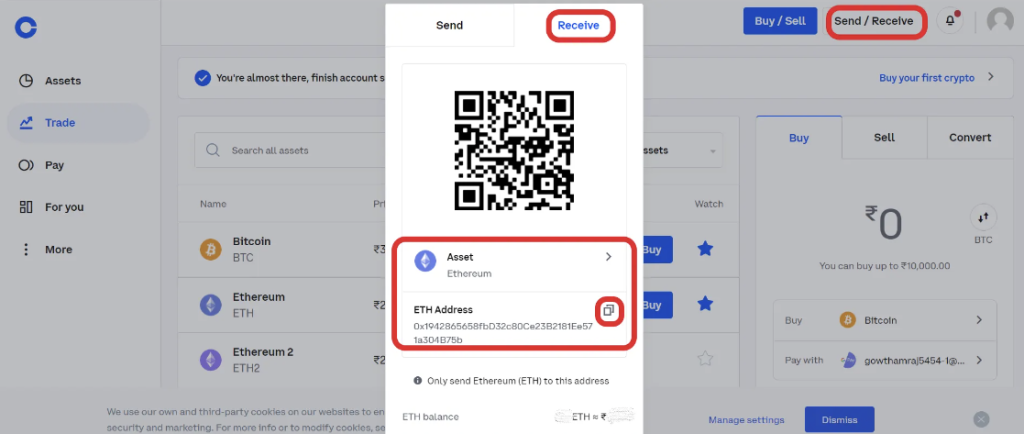
Once you are logged in to your Coinbase account, click on the “send/receive” button on the top right. Now tap on the “receive” section. Click on the “asset” part and select the cryptocurrency you would like to receive. We will use ETH as an example. Copy the address.
Let’s now go to your Metamask wallet. You have to be on the Ethereum mainnet if you wish to receive ETH.
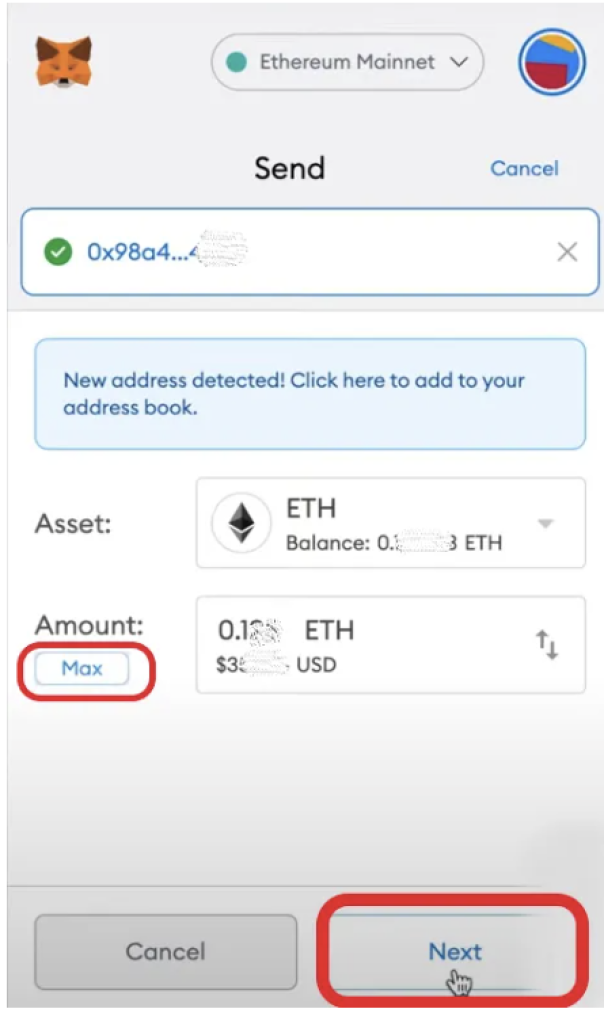
Click the “Send” button now. The address you copied from Coinbaseneeds to be pasted there. Enter the amount of ETH that you want. If you wish to transfer the maximum ETH possible, click the Max option. Finally, click Next.
Once you click on the “next” button, you will see the estimated gas fee, and if it looks acceptable to you, then click on the “confirm” button. Now you have to wait for a few minutes.
Usually, it takes a few minutes for the transaction to be confirmed. You can go to the “activity” tab on your Metamask wallet and check if your transaction is pending or confirmed, as shown in the screenshot below.
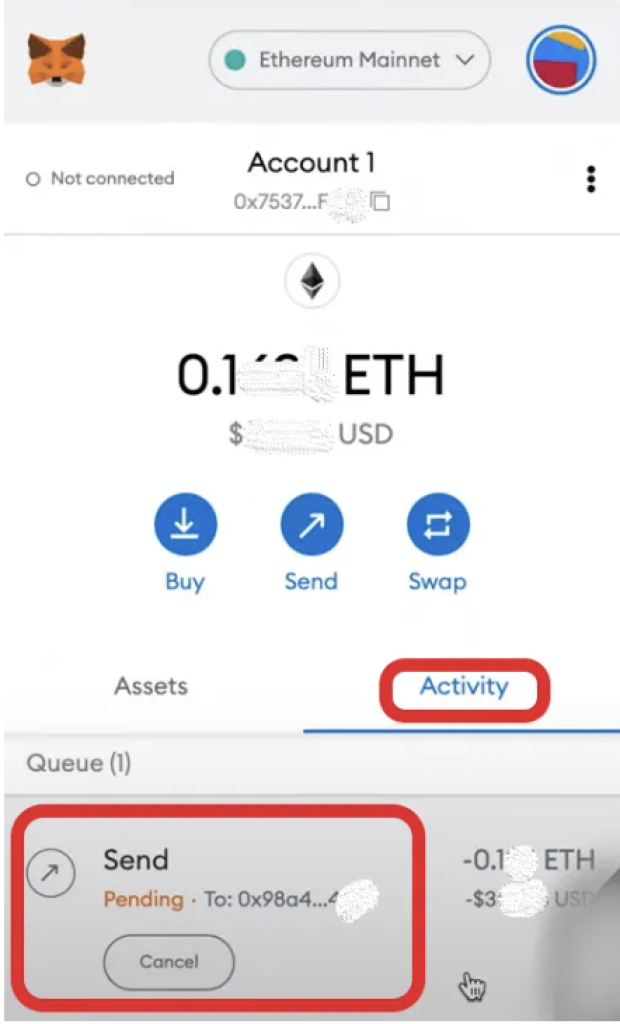
In our concrete example, we have waited for 7 minutes for the transaction to be confirmed.
Read also:
- How to Sell Crypto for Fiat on MetaMask?
- Best Crypto Wallets for Day Trading: Enhancing Security, Accessibility, and Profitability
- Best DeFi Wallets: Crypto Wallets For Yield Farming And Liquidity Mining