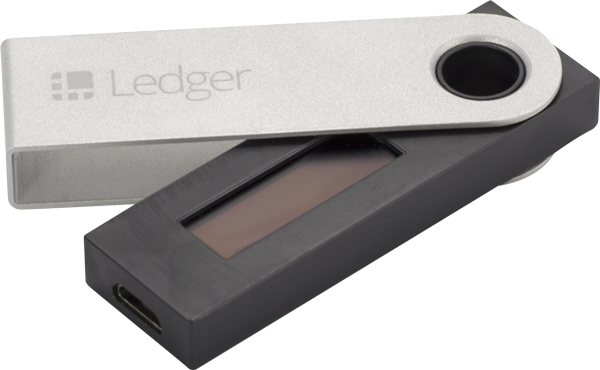
Ledger Nano S is a Bitcoin, Ethereum and Altcoins hardware wallet, based on robust safety features for storing cryptographic assets and securing digital payments. It connects to any computer (USB) and embeds a secure OLED display to double-check and confirm each transaction with a single tap on its side buttons.
When you own cryptocurrencies, you need to protect your confidential data and the access to your funds. With Ledger Nano S, secrets like private keys are never exposed: sensitive operations are isolated inside your hardware wallet within a state-of-the-art Secure Element, locked by a PIN code. Transactions can’t get tampered with; they are physically verified on the embedded screen with a simple press of a button.
Ledger Nano S includes Bitcoin, Litecoin, Ethereum and Ethereum Classic companion apps, and other blockchain-based cryptocurrencies. You can send and receive payments, check your accounts and manage multiple addresses for each currency from the same device. Nano S also supports the FIDO® Universal Second Factor standard that simplifies the authentication process on compatible online services such as GMail, Dashlane, Dropbox or GitHub.
What you'll learn 👉
How to Send Bitcoin Using the Ledger Nano S
In order to be able to send cryptocurrencies using your Ledger Nano S, you must first initialize your device. Once initialized you will need to download the Ledger Manager application, along with the Ledger Bitcoin Wallet.
When you want to receive coins, you just have to provide your address to the payer. Your Ledger Nano S does not need to be connected as the transaction is made on the blockchain, not on the device itself. Next time you connect your wallet, it will synchronize to the blockchain to display all of your past operations and your balance.
To send Bitcoin using your Ledger Nano S, you need to follow these steps.
- You need to connect your Ledger Nano S to your computer. You will be asked to enter your PIN.
- Open the Bitcoin app on your Nano S using the right click. Make sure the browser support is set on NO
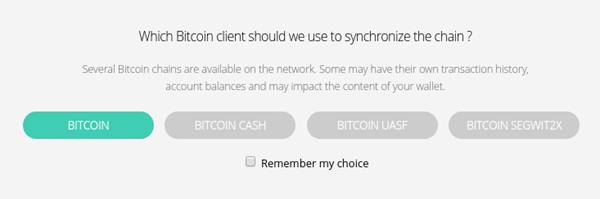
- Launch your Ledger Bitcoin Wallet Chrome application on your computer. The Ledger Wallet Bitcoin application is the same interface to manage both your BTC and your BCH (and also some other altcoins). You must select on which chain you want to operate.

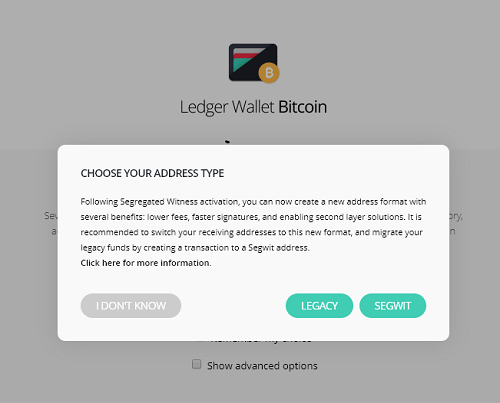
- When starting your Ledger Bitcoin app, you may be asked to choose between Legacy and Segwit address type. Choose whichever type of address you use to store your Bitcoin.
- On the following screen, click on „Send“, and a popup window will open.
- Fill in the required fields (enter the BTC amount, paste the recipient address, select the level of fees, click on the „Send“ button).
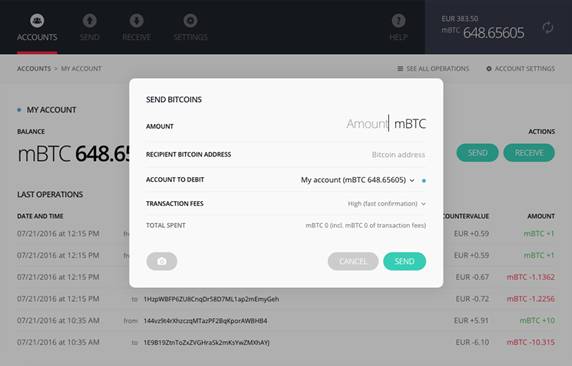
It is important to note that the fees are not charged by Ledger Company but by Bitcoin miners. In the Ledger Bitcoin Chrome application you can select between 3 levels of fees. These fees are dynamically estimated depending on the amount and the number of outputs needed to send this amount.
Fees levels
High fees: on average 10 minutes (not guaranteed)
Standard fees: on average 30 minutes (not guaranteed)
Low fees: on average 60 minutes (not guaranteed)
Custom fees: you can set them to the rate you need to
Fees amounts are dynamically calculated, depending on each specific transaction. When you fill in the amount, the popup automatically calculates the fees and the total spent, and you can estimate the 3 types of fees by clicking on each level in the scroll menu.
- Your Nano S requires your manual consent to authenticate this transaction: press the right button (above the „V“ check icon) to confirm and initiate your transaction once you have verified the details of your transaction are right and wait until your Chrome app displays „validated“
- Your transaction is validated and will be tracked on the Blockchain as soon as it is confirmed by miners in accordance with Bitcoin protocol. While waiting for this confirmation, your Ledger device can be disconnected as your transactions are tracked on the Blockchain. These transactions will be synchronized on your wallet when you open it.
Read also:
- Best crypto hardware wallets
- Best bitcoin wallets
- Best cryptocurrency wallets
- Trezor T review
- Ledger Nano X review
- KeepKey review
- CoolWallet S review
- Archos Safe T Mini review
Sending Failed: An Error Occurred
If you get the message: „Sending Failed: An error occurred“, it means some of the following:
– You did not use the right application on your Ledger Nano S.
– Synchronization failed. Reset the Chrome application by clicking on Settings > Tools > Reset application data and try again.
– Servers or the blockchain network are temporarily overloaded. Try again later.
– The (amount + fees) exceed your total balance.
– There is an unconfirmed transaction in your wallet. You need to wait until this transaction is confirmed or rejected.
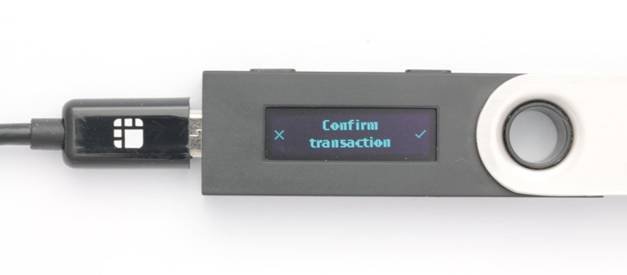
– You did not confirm the transaction. When you try to make a transaction, the Nano S displays the message „Confirm transaction“ with a cross on the left and a check icon (✓) on the right. After verifying that the receiving address is correct, you can press on the check icon button.
How to Transfer Bitcoin to Ledger Nano S
Step 0. First things first, connect your Ledger to your computer with the USB cable and enter your pin code.
Step 1. Open the Ledger Wallet Bitcoin app on your computer. It will most likely show a message to connect and unlock your Ledger wallet.
Step 2. Navigate to and open the Bitcoin app on your Ledger using the buttons at the top of the wallet.
*NOTE: If you can’t find the Bitcoin app on your Ledger, you may have to download it from the Ledger Manager.
Step 3. When first opening up the Bitcoin wallet, it gives you the option to choose Bitcoin or Bitcoin Cash. Since we’re receiving Bitcoin, choose Bitcoin.
Step 4. Then, you have the option of Legacy or Segwit. In most cases, SegWit is the better choice as it has faster transaction times and lower fees.
Step 5. Once in the wallet, you should see your account balance, recent transactions, as well as a few menu options at the top. Click “Receive” at the top of the wallet app. A pop-up menu should appear.
Step 6. In the pop-up, choose which account you want to receive your Bitcoin to (you probably only have one option). Then, click “Display Address On Device.”
Step 7. Next, you’ll see a QR code and address on the pop-up. Make sure that the address on the pop-up matches the address that your Ledger is showing. Some users have reported malware in which a hacker will spoof your address replacing it with their address instead.
Step 8. If both addresses match, you know the address is safe to receive funds. Enter this address (or scan the QR code) into the appropriate place of the funding source you’re using.
Step 9. With that, send your Bitcoin.
Step 10. Once your transaction is confirmed, it’ll appear in your transaction history and your account balance will be updated.